Photography today has become a very common factor today unlike in the past. A few years back, we had to carry big cameras with film rolls. We could take only a limited amount of pictures and when a picture goes wrong or you click them wrong, there is no option to delete them or re-correct them.
Not all the phones have the best camera quality and not all the phones comes with the best photo editing features. That is why we all look for a better way to edit the photos we capture with good lighting effect, filters and colors. Not only pictures but some of us look for a better editing application for videos too. There are so many applications that’s available in the app store to edit our pictures and videos but we will find it really hard to get an application that helps edit both videos and photos in one app.
When we talk about photo editing application we also check if they are free apps or paid ones. We will come across many free apps but not all of them will do the job perfectly as we prefer. Some of them will have very few filters, some will not have the filters or effects that you are looking for, some won’t even have the most needed features in them. So with so many such problems, we still will not want to give up on making our pictures look perfect. So hunting for the best app will go on. But you doesn’t have to worry about it now, as we have come with the best of best photo editing app you will need so far.
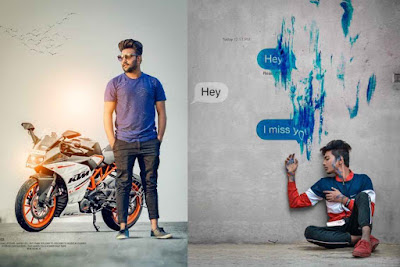
The app ‘PicsArt Photo Editor’ is an all in one app with all the professional features included in it. Along with that the unique feature in it is, it does not only help you with the photo editing but also with video editing as well. You can also make collages and add in beautiful trending filters and effects to your photos from the big list that’s available. Not only that, the user will be able to do doodling and create cute stickers as well. There is another amazing option in this app and that is the ability to remove unwanted objects from the picture. For example if you have captured a wonderful scenic picture but there are a few people in the background, then you can remove them out of the pic. Along with this, the touch retouch feature and the beautifying tools such as changing the skin tone, hair color and eye lenses are included in the app. If you also want to blend photo layers and create double exposure edits then this app is the one for it too.
If we talk about video editing in this app, then we have to mention about the options of adding music to the video clip, use glitch effects, create slideshows, add filters, create video collage and so much more. You can edit seamlessly beautiful videos using all the wonderful effects, music and give life to you video clips by making a slideshow or a video collage as you prefer. This app will allow you to crop and cut videos to get them fixed in the ratio that u need.
Along with all the above mentioned features you also get the combinations of drawing tools, photo effects, sticker maker and the in app sticker loads makes this one one of the best editing apps ever. The collage maker in the app comes with so many photo grids, freestyle collage, scrape books and frames. It is also easy to start the select the options and start creating the best. Just a few clicks and then you will have a professional looking photo edited in no time, not only photos but also videos. Your photos are going to go viral in Instagram and Facebook. Your videos are going to start up a trend in Tiktok. Sounds so great, isn’t it? So come without wasting more time let us start creating the best with the best app.
Now let's move on to know how to create a professional looking photo by editing them by adding filters and effects and make it look cinematic.
When you select have selected a photo from the phone gallery, it will be loaded in the app and all the editing features will be visible in the bottom of the screen too.
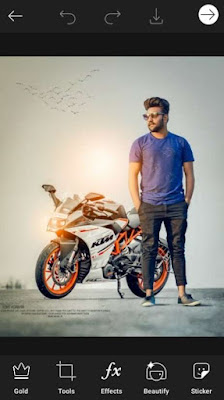
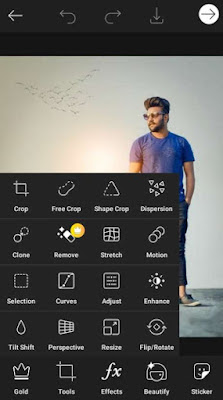
You can now click on the ‘Tools’ option which will help to make all the adjustments such a crop, resize or sharpen the photo before we start adding filters or effects to it.
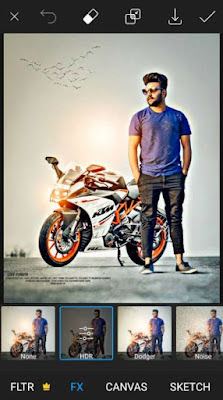
Thereafter select the ‘Effects’ option in which you will come across so many effects such as the FX, canvas, sketch and more such features.
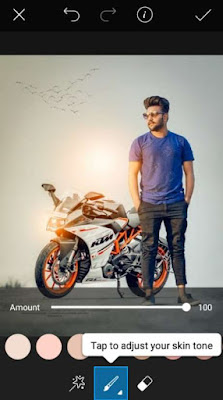
When all the needed effects are added to the picture, you can come back to the main interface and select the ‘Beauty’ feature, from where you can edit the tiny details to your face and skin, such as changing the eye lenses color, skin tone and teeth whitening.
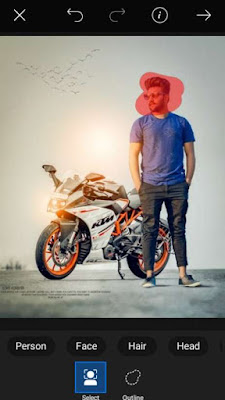
The best feature from this app that is talked about in this app is the ‘CutOut’ tool. This feature is available in the main menu and with this tool you can also create birthday greetings, customize wallpapers and create memes. All you have to do is select the ‘CutOut’ tool and select the area on your picture and color it to custom cut your photos.
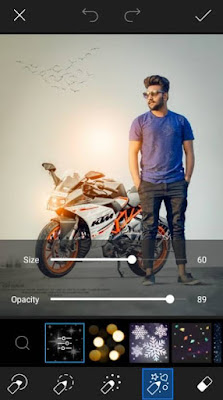
Along with all of these tools, the app ‘Picsart’ comes with many features such as
‘Text’, borders, masks, brushes, lens flares, frames and so on which will be the best to create a picture with cinematic features.
That’s it, so all these features will bring out the best in your photo after editing them. So you can download this application directly form Google playstore to your Android smartphone by Clicking here.
With all these, creating a beautiful photo with a professional and cinematic look is a very easy task. You does t have to go finding professionals or paid apps to get it done. With a few clicks, you photo will look amazingly beautiful with the help if this all in one app.
But today the days are so changes that we have the possibility to take as many as pictures we want and it’s literally unlimited. The option to delete pictures or edit them are some of the best things that have changed so far. As most of us take pictures using our smartphones, we always wish to edit our pictures before we could share them with anyone or in any social media platforms.
Not all the phones have the best camera quality and not all the phones comes with the best photo editing features. That is why we all look for a better way to edit the photos we capture with good lighting effect, filters and colors. Not only pictures but some of us look for a better editing application for videos too. There are so many applications that’s available in the app store to edit our pictures and videos but we will find it really hard to get an application that helps edit both videos and photos in one app.
When we talk about photo editing application we also check if they are free apps or paid ones. We will come across many free apps but not all of them will do the job perfectly as we prefer. Some of them will have very few filters, some will not have the filters or effects that you are looking for, some won’t even have the most needed features in them. So with so many such problems, we still will not want to give up on making our pictures look perfect. So hunting for the best app will go on. But you doesn’t have to worry about it now, as we have come with the best of best photo editing app you will need so far.
The app ‘PicsArt Photo Editor’ is an all in one app with all the professional features included in it. Along with that the unique feature in it is, it does not only help you with the photo editing but also with video editing as well. You can also make collages and add in beautiful trending filters and effects to your photos from the big list that’s available. Not only that, the user will be able to do doodling and create cute stickers as well. There is another amazing option in this app and that is the ability to remove unwanted objects from the picture. For example if you have captured a wonderful scenic picture but there are a few people in the background, then you can remove them out of the pic. Along with this, the touch retouch feature and the beautifying tools such as changing the skin tone, hair color and eye lenses are included in the app. If you also want to blend photo layers and create double exposure edits then this app is the one for it too.
If we talk about video editing in this app, then we have to mention about the options of adding music to the video clip, use glitch effects, create slideshows, add filters, create video collage and so much more. You can edit seamlessly beautiful videos using all the wonderful effects, music and give life to you video clips by making a slideshow or a video collage as you prefer. This app will allow you to crop and cut videos to get them fixed in the ratio that u need.
Along with all the above mentioned features you also get the combinations of drawing tools, photo effects, sticker maker and the in app sticker loads makes this one one of the best editing apps ever. The collage maker in the app comes with so many photo grids, freestyle collage, scrape books and frames. It is also easy to start the select the options and start creating the best. Just a few clicks and then you will have a professional looking photo edited in no time, not only photos but also videos. Your photos are going to go viral in Instagram and Facebook. Your videos are going to start up a trend in Tiktok. Sounds so great, isn’t it? So come without wasting more time let us start creating the best with the best app.
How to Edit Your Photo with Cinematic Look
You have to get the app named ‘PicsArt Photo Editor’ directly from Google playstore to your Android smartphone or tablet.Now let's move on to know how to create a professional looking photo by editing them by adding filters and effects and make it look cinematic.
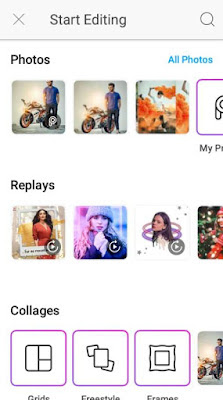
Firstly, you have to open the app in your phone and from the main interface of the app select the plus icon to select a photo you want to edit using the ‘PicsArt’ app.
‘Text’, borders, masks, brushes, lens flares, frames and so on which will be the best to create a picture with cinematic features.
With all these, creating a beautiful photo with a professional and cinematic look is a very easy task. You does t have to go finding professionals or paid apps to get it done. With a few clicks, you photo will look amazingly beautiful with the help if this all in one app.